हैलो दोस्तों Gujarati Help Guru में आपका स्वागत है। आज की पोस्ट मे हम आपको Blogger Blog में Custom URL Redirects की पूरी जानकारी हिंदी में देंगे. आप जानेंगे कि Blogger Blog में Custom URL Redirects कैसे करते हैं? How To Redirects Custom URL in Blogger Blog?
ये Blogger Post for Beginners To Advance in Hindi Series का 31 मा Tutorial है. आपको सभी Tutorial पढ़ना है तो यहाँ क्लिक करे Blogger Tutorial In Hindi
What is Custom URL Redirects in Hindi?
URL Redirect एक ऐसा Function होता हैं जिसकी सहायता से एक URL को दूसरे URL पर Point किया जाता है.
मतलब Visitors द्वारा xyz.com/Post-1/ सर्च किया जा रहा है तो इस URL को सर्च करने पर Server द्वारा Visitors को xyz.com/Post-2/ पर भेज दिया जाता है. और इस कार्य के बारे में Visitors प्रभावित नही होता है.
URL Redirection का कार्य सर्वर पर होता है और सर्वर द्वारा ही Execute किया जाता है. इसलिए सामान्य पाठकों को इस बारे में पता नही चलता है.
लेकिन, खुद Blog Owners अपने पाठकों को इस बारे में सूचित कर सकते है. जो पाठकों से संबंध मजबूत करने की ओर सफल कदम होता है.
URL Redirect के द्वारा Blog Owners डिलिट किये गये वेबपेज, Updated URLs आदि को New URL पर Point कर सकते हैं. और यहीं कार्य Blogger Blog पर Publish Posts/Pages के लिए किया जाता हैं.
यदि आपने किसी Blogger Post का Permalink Address Change किया हैं. कोई Page या Post Delete की हैं. दो या अधिक पोस्टों को Merge किया हैं. तब आप Blogger Blog में Custom URL Add कर सकते हैं.
Custom URL Redirect के फायदें
Custom URL Redirect का सबसे बडा फायदा होता है कि ब्लॉग पाठकों को हमेशा जानकारी उपलब्ध रहती है. उन्हे खाली नही लौटना पडता है. जो Blog Owners और Visitors दोनों के लिए महत्वपूर्ण होता हैं.
इसके अलावा:
- Search Engines के लिहाज से URL Redirect करना एक समझदारी भरा कार्य हैं. क्योंकि सर्च इंजनों को भी 404 – Page Not Found पसंद नही हैं. इसलिए Blog Ranking के लिए उपयुक्त URL Redirect का इस्तेमाल करना बेहतर होता है.
- Merged Posts/Pages को New URL पर Redirect करने के लिए
- Deleted Posts/Pages को Updated Post/Page पर Redirect करने के लिए
- यदि आपने किसी Publish Posts/Pages का P Address Change किया है तो उसे New URL पर Point करने के लिए करने के लिए किया जाता हैं.
Blogger Blog में Custom URL Redirects Set करने का तरीका
—Step: #1—
Blogger.com पर जाकर गूगल अकाउंट से Log in कीजिए. Log in करने के लिए आप अपनी Gmail ID और Password का इस्तेमाल करें. और उसी अकाउंट का इस्तेमाल करे जिससे आपने ब्लॉगर पर Sing in किया था.
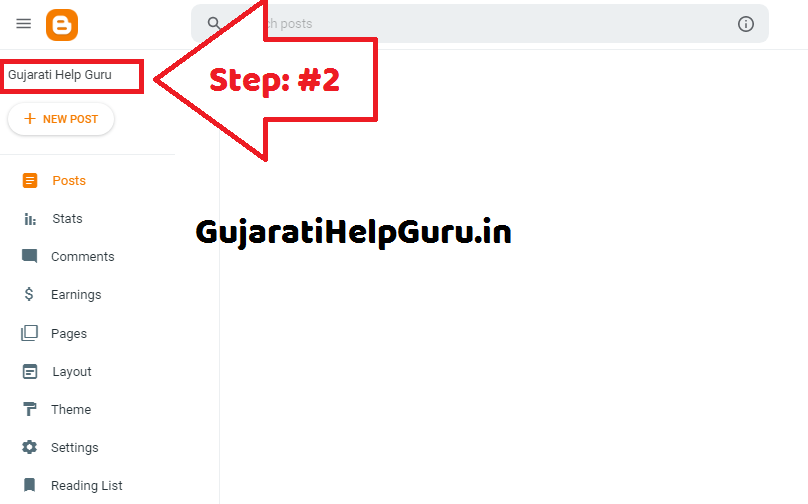
—Step: #2—
Blogger पर लॉग इन करने के बाद आपके सामने Blogger Dashboard खुल जायेगा. यहाँ से आप Blog List से Down Arrow ⌄ की सहायता से अपना ब्लॉग सेलेक्ट कर लें.
मतलब आप जिस Blogger Blog को अपडेट करना चाहते है. अगर आपके पास एक से ज्यादा ब्लॉग है तो. अगर आपके पास केवल एक ही ब्लॉग़ है तब आप ये स्टेप छोड दें.

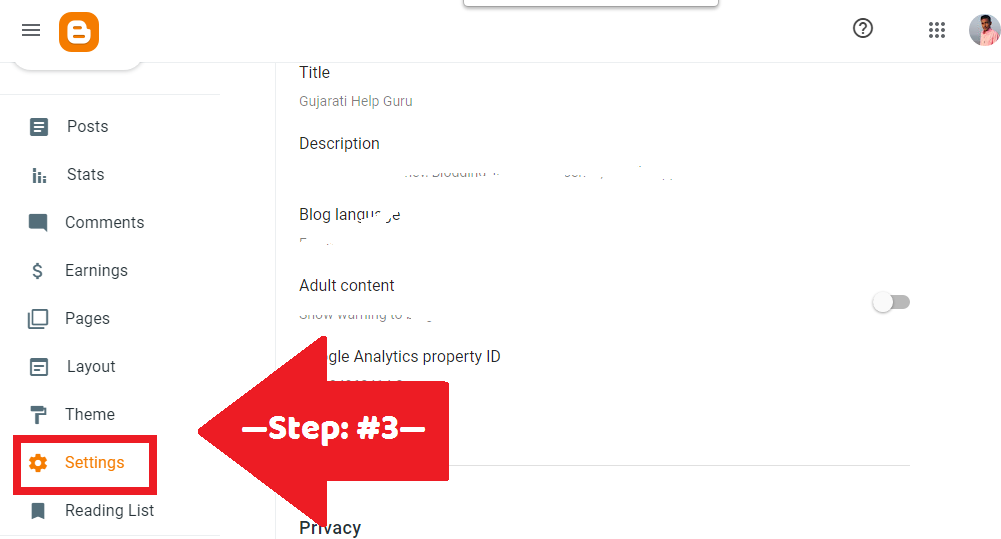
—Step: #3—
अब आपके सामने Blog Specific Dashboard Open होगा. यहाँ से आप बांए तरफ मौजूद Settings पर क्लिक कीजिए.

—Step: #4—
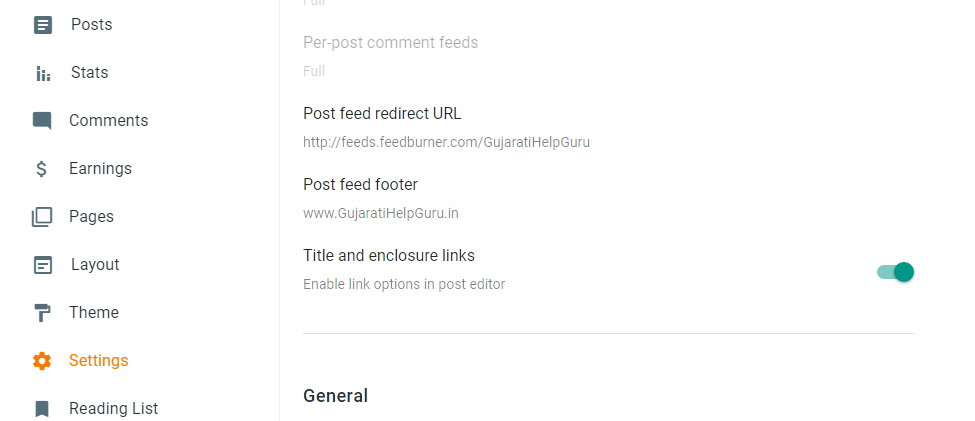
ऐसा करने पर आपके सामने Blogger Settings Expand हो जायेगि. यहाँ से आप Search Preferences सेटिंग पर क्लिक कीजिए.

—Step: #5—
अब आपके सामने Blogger Search Preferences सेटिंग Open होगी. यहाँ से आप Errors and redirections के भीतर मौजूद Custom redirects के सामने Edit पर क्लिक कीजिए.
—Step: #6—
- From: इस बॉक्स में आपको उस URL को लिखना है जिसे आप Redirect करना चाहते है.
- To: इस बॉक्स में आपको उस URL को लिखना है जिस पर आप पूराने URL को भेजना चाहते है. जैसे आपका पूराना URL xyz.com/Post-1/ है और आप इसे xyz.com/Post-2/ पर भेजना चाहते है तो यहाँ पर xyz.com/Post-2/ को लिखिए. और पहले वाले में abc.com/this-url लिखा जायेगा.
- Permanent: यदि आप इस Change को हमेशा के लिए कर रहे है तो इस बॉक्स को Check कीजिए. अन्यथा रहने दीजिए.
बधाई हों! आपने Successfully Custom URL Set कर लिया है. आप इसी तरह अन्य URLs को भी Set कर सकते है.
How do I create a custom redirect in Blogger?
1. On Blogger, go to Settings > Search Preferences > Errors and Redirections > Custom Redirects and click the Edit text. The From and To field will have http://www.yourblogname.blogspot.com or http://www.yourblogname.com already there, allowing you to add to the end.
2. In the From field add in the rest of the URL of the page or post like /myoldblogpost.html. Altogether then this will become the full URL.
3. Similarly, type in the address of your new redirected URL in the To field, minis the http://www.yourblogname.blogspot.com or http://www.yourblogname.com part.
4. Blogger lets you choose from two types of redirects. By ticking the box beside Permanent you are setting up a 301 redirect. Use this when you’ve deleted or changed the post/page URL and want to permanently redirect the visitor. Any traffic or SEO work will be passed on to the new URL. Leave the box untucked if wanting a temporary redirect, useful if you are editing the post/page but it is linked in your navigation or on your blog somewhere. It takes visitors to the new URL so they aren’t seeing a missing page or a “coming soon” page.
5. Click save and then save changes. Now if a visitor goes to your old/deleted post or page, they will be redirect to the new URL.
How do I redirect a blog to another URL?
Go to Blogger and log into your website. When you’re viewing the main dashboard, click on ‘Theme’ in the left hand menu. You’ll see a preview of your theme with the option to ‘Edit HTML’ under the ‘Live on Blog‘ window. Obviously you’ll replace yournewwebsite.com with your new url!
How do I create a custom redirect link?
How to Create a URL Redirect
1. Log into cPanel using the details your host gave you when you first signed up.
2. Scroll to the Domains section and click Redirects.
3. Choose the type of redirect you want. …
4. Choose the domain name you want to redirect from the drop-down box. …
5. Type the rest of the path to the file or folder you want to redirect.
What is a custom redirect URL?
Description. Custom redirects are used with visitors in mind to track banner ad clicks, links to third-party sites, links on social media, and access to files hosted outside of Pardot.
How do I link one page to another in Blogger?
1. Sign in to Blogger.
2. In the top left, select a blog.
3. From the menu on the left, click Layout.
4. In the “Page List (Top)” section next to “Pages,” click Edit .
5. Under “Pages to show,” click + Add external link.
6. Enter the page title and URL and click Save Link. Save.
How do I add a 301 redirect to Blogger?
1. Go To Your Desired “Blog” Dashboard.
2. Go To “Setting”.
3. Go To “Search prefences”.
4. Click “Edit” On Custom Redirects ? …
5. Now Add Your Desired Old Post URL In “From” Input Section And Your URL Should Be Like /YEAR/MONTH/POST-TITLE.html.
Conclusion
आज की पोस्ट में हमने आपको Blogger Blog में Custom URL Redirects की पूरी जानकारी हिंदी में दी हैं. आपने जाना की किसी URL को Redirect कैसे करते है. हमे उम्मीद है कि यह Post “Blogger Blog में Custom URL Redirects की पूरी जानकारी हिंदी” आपके लिए उपयोगी साबित होगा.
अगर आप हमारी वेबसाइट के Latest Update पाना चाहते है, तो आपको हमारी Gujarati Help Guru की वेबसाइट को सब्सक्राइब करना होगा।
हमारे साथ जुड़ने के लिये Join Social Media: FB Page | Telegram | WhatsApp | Instagram | Twitter
फिर मिलेंगे आपसे ऐसे ही आवश्यक जानकारी लेकर तब तक के लिए अलविदा दोस्तों हमारी पोस्ट पढ़ने के लिए धन्यवाद।
🎉आपका दिन शुभ हो।

